
We’re letting you know that this post contains sponsored links which Your Savvy Purse receives compensation for, which may impact their order of appearance.
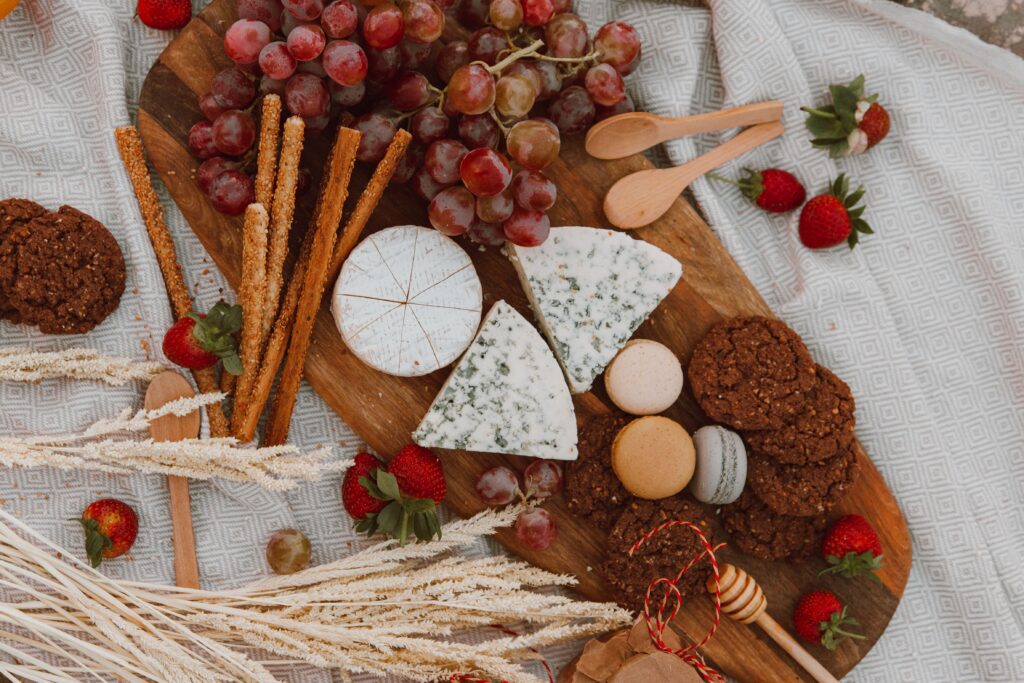
Dessert boards have become the go-to showstopper for parties, holidays, and get-togethers, and for good reason — they look elaborate while actually requiring very little cooking or baking skill. The trick is knowing how to balance textures, colors, and flavors so the final board looks curated rather than random. Here’s exactly how to build one that impresses every time, plus a few ideas to customize for any occasion.
Start With a Good Base Surface
The board itself sets the tone for the whole presentation, and the wrong surface can make even great desserts look messy or crowded.
Do this: Use a large wooden board, marble slab, or even a clean baking sheet lined with parchment as your base, giving yourself enough surface area to spread items out without overcrowding.
Choose a Mix of Textures, Not Just Flavors
A board filled with only soft, similar-textured items (all cookies, for example) looks and tastes less interesting than one with contrast.
Do this: Include a mix of crunchy (cookies, pretzels, biscotti), soft (marshmallows, cake bites), and chewy (caramels, dried fruit) items for a more dynamic board.
Anchor the Board With Two or Three “Hero” Items
Every great dessert board has a few standout pieces that draw the eye first, with smaller items filling in around them.
Do this: Choose two or three larger items (a small cake, a bowl of dip, a stack of brownies) as anchor points, then build the rest of the board around them.
Use Small Bowls for Anything Sticky or Loose
Loose items like candy, dips, or sauces can make a board look messy if placed directly on the surface.
Do this: Use small ramekins or bowls for anything sticky, saucy, or prone to rolling around, tucking them into gaps around the larger anchor items.
Layer Height for Visual Interest
A completely flat board can look one-dimensional, even with great dessert choices.
Do this: Use small stands, overturned bowls, or stacked plates underneath a cloth to create varying heights across the board, making it feel more dynamic and abundant.
Balance Color Intentionally
A board filled entirely with brown and beige desserts (however delicious) tends to photograph and present less appealingly than one with color variety.
Do this: Incorporate colorful elements like fresh berries, colorful macarons, or dried fruit to break up heavier, more monochromatic dessert options.
Fill Gaps With Small, Repeatable Items
Empty gaps between larger items can make a board look sparse or unfinished.
Do this: Use small, repeatable fillers like chocolate chips, nuts, mini marshmallows, or candy pieces to fill gaps and create a lush, abundant look without much extra effort.
Consider a Theme for Cohesion
A board with no unifying theme can feel like a random assortment rather than an intentional dessert experience.
Do this: Choose a loose theme (chocolate lovers, seasonal fruit, a specific holiday) to guide your item choices, creating a more cohesive final presentation.
Add Fresh Herbs or Edible Flowers for Polish
A few unexpected garnishes can elevate a dessert board from “nice” to genuinely impressive with almost no added effort.
Do this: Tuck a few sprigs of mint, edible flowers, or citrus slices into gaps around the board for a professional, finished touch.
Don’t Overthink the Dip Options
A good dip or two adds interactivity to a dessert board without requiring any baking at all.
Do this: Include one or two simple dips (like a chocolate ganache, caramel sauce, or flavored whipped cream) alongside dippable items like fruit, pretzels, or cookies.
Label Items for Guests With Allergies or Preferences
Guests are often hesitant to try items without knowing what’s in them, especially at larger gatherings.
Do this: Use small handwritten labels or cards for items with common allergens (nuts, gluten, dairy) so guests can navigate the board confidently.
Build the Board Close to Serving Time
Assembling a dessert board too far in advance can lead to soggy textures or melted elements by the time guests arrive.
Do this: Assemble the board within an hour or two of serving whenever possible, adding any temperature-sensitive items (like chocolate-dipped items) last.
Prep Components Ahead, Assemble Last
While the full board should be assembled close to serving time, individual components can be prepped well in advance.
Do this: Bake, portion, and pre-cut items a day or two ahead, storing them separately so final assembly takes only a few minutes right before guests arrive.
The Bottom Line
A stunning dessert board isn’t about elaborate baking skills — it’s about thoughtful assembly, textural variety, and a few visual tricks that make store-bought and homemade items alike look intentional and abundant. With a little planning around texture, color, and height, anyone can build a dessert board that becomes the centerpiece of the party.